DIY Brake Job: 1991 Toyota Land Cruiser

1991-1997 FJ80/FZ80 Brake Repair and Replacement
The 1991 FJ80 replaced the aging FJ60 as the 4×4 wagon in Toyota’s luxury line of trucks. Although the then new trucks were more comfortable and featured EFI and coil spring suspension, the brakes were rated as marginal by offroad enthusiasts with trail experience.
We agree that the brakes on our 1991 Toyota Land Cruiser were not great, but some of that comes from a simple lack of maintenance. The 1991 Toyota Land Cruiser has 11.25-inch front disk brakes and 10.5-inch rear drums. These older disk/drum combinations required a load sensing proportioning valve (LSPV) to keep the rear drums from locking up under hard braking when all the weight of the vehicle shifted forward. Old brake fluid, cranky LSPV valves, and heat hardened pads all contribute to the perception and terror, of bad brakes. The following will make the 1991 Toyota braking system the best that it can be.
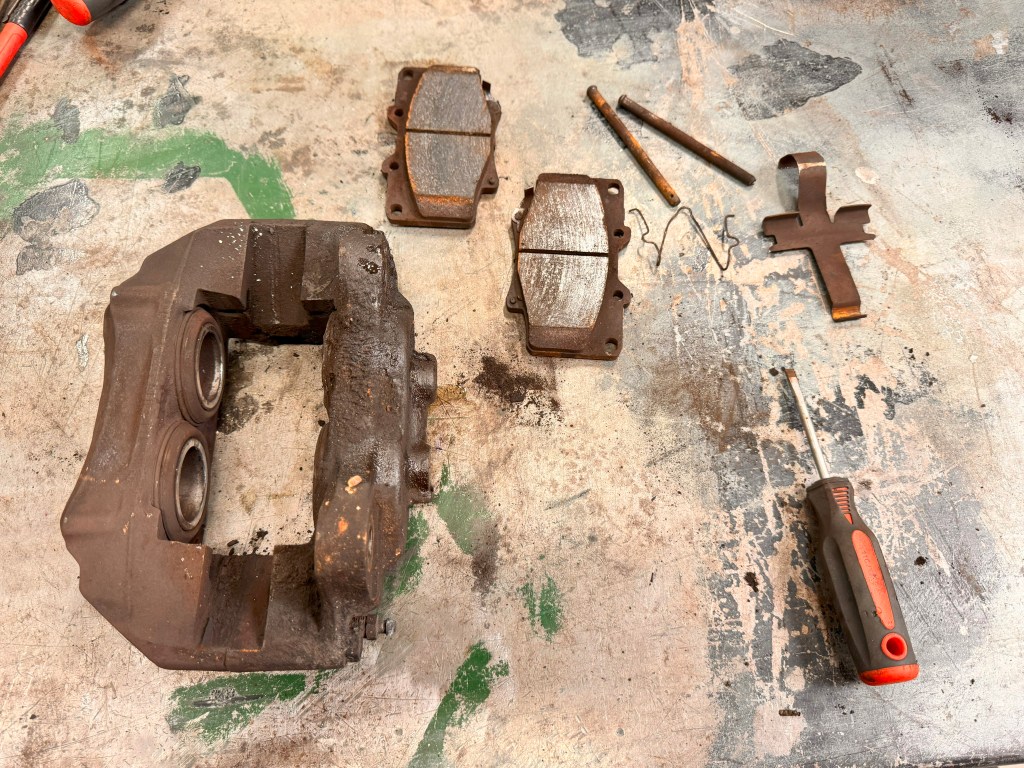
The front brakes on the Land Cruiser have two-piece, four-piston calipers that are bolted together. They are attached to the spindle using two large bolts. The two steel pins hold the brake pads in place.

These are two of the crusty pistons that force the pads against the rotor. There are two more on the other side of the caliper.

The trick to removing the pistons is to place a piece of wood between the pistons and a brake pad and blow compressed air through the brake-fluid port.

Safety first. It doesn’t take a lot of air pressure to drive the pistons out of the bores and across the room. We dropped a towel on the caliper to keep the parts in place and shot some air through the brake line port.

If the pistons aren’t cracked or heavily scored, they can be polished using a red Scotch-Brite pad.

After the pistons were removed, the caliper was disassembled for cleaning.

There a couple of tricks to cleaning the caliper halves. First, we used POR-15 degreaser and hot water, mixed at a 4:1 ratio. The second trick is to use a bucket inside of the ultrasonic cleaner to save clean up time.

After a day in the degreaser, the caliper can be reassembled using a rebuild kit and brake fluid as a lubricant.

With the pistons in the fully-compressed position it is possible to slide the brake pads into the caliper after it is installed on the rotor using the installation pins.

To get the rear drums off, there is a small trap door near the brake line fitting at the top of the backing plate. Turning it loosens the brake shoes, allowing the drum to be removed without a hammer or cutting tools. Up to loosen, down to tighten the brake shoes against the drum.

Once the drums are off, you can see the brake cylinder at the top and the brake shoes. The best thing to do is replace the shoes and the hardware at this point. If the brake cylinder isn’t leaking, leave it alone.

The spec for the brake drum is stamped inside. This drum was at spec (297mm) so it will need to be replaced during the next brake job.

The rotor spec is 23.0 mm minimum with a standard thickness of 25.0 mm. Rotors aren’t repaired or turned anymore so they will need to be replaced when they get below 23 mm.

This is the notorious LSPV that is attached by a rod to the axel housing and through some witchcraft modulates brake pressure when the vehicle is loaded. When it fails, the rear brakes don’t work.

The easy way to test the LSPV is to open a bleeder and step on the brake. If no fluid flows, test the valve itself by pulling on the rod to see if it is free. Dead ones can be replaced for about $300 online. We recommend avoiding the $50 version, these are your brakes after all. When everything is back together, use our brake bleeding guide to fill and pressurize the system.
- Source: POR-15
- Parts: POR-15 degreaser, Vevor Ultrasonic Cleaner, Caliper Rebuilt Kit PN D352712, Rear Brake Shoes, Front Brake Pads
The post DIY Brake Job: 1991 Toyota Land Cruiser appeared first on The Online Automotive Marketplace.


